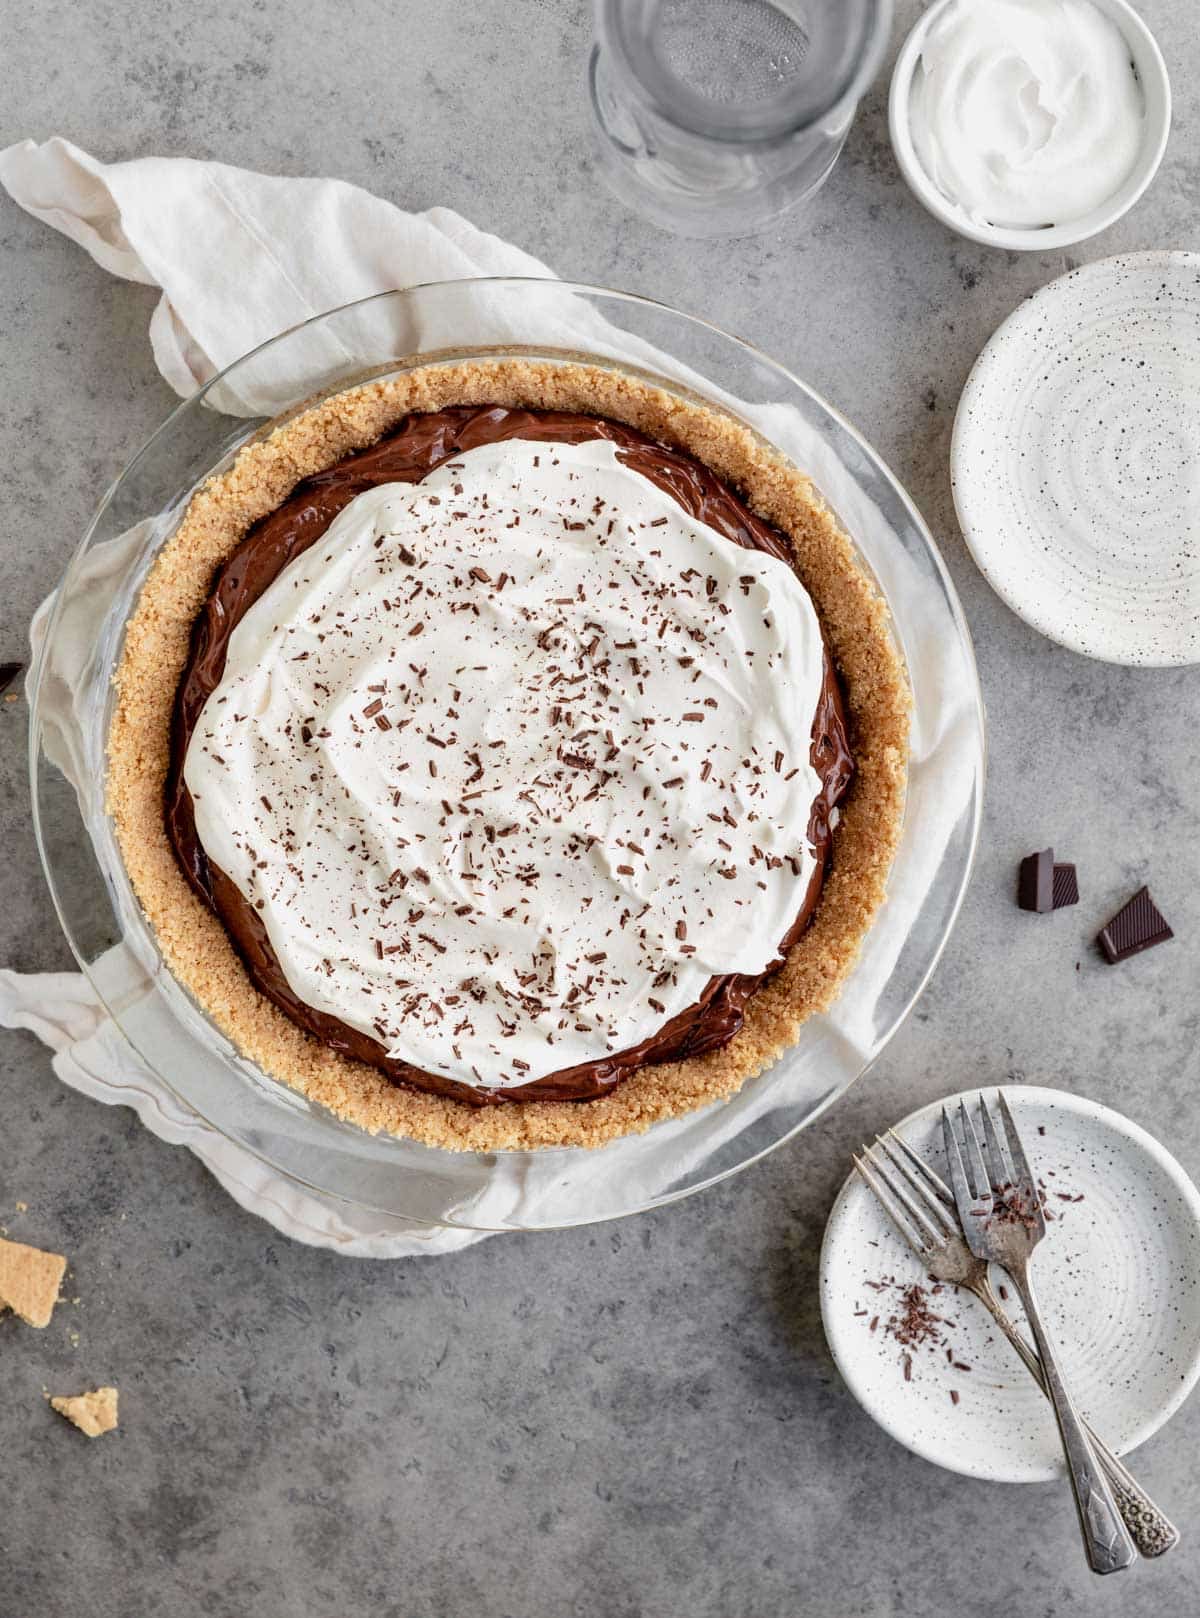
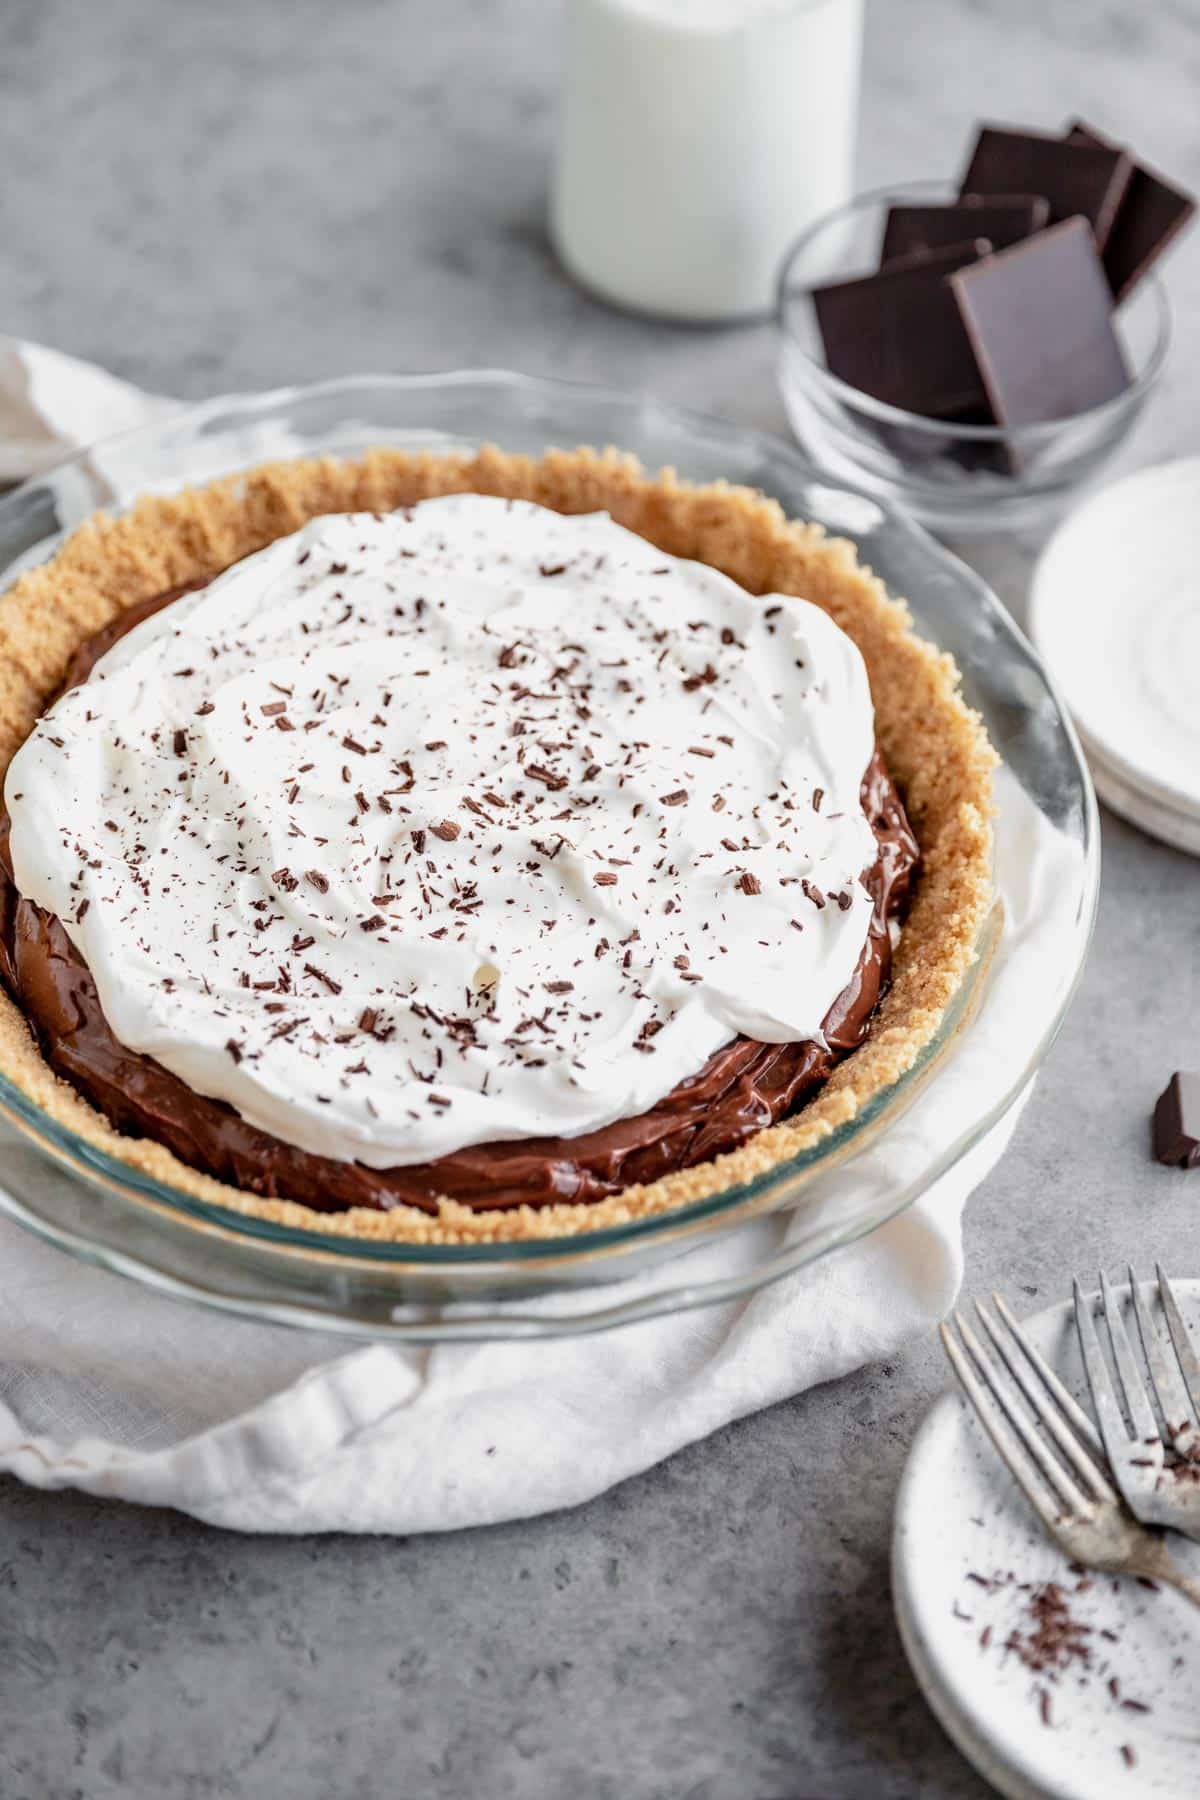
No-Bake Chocolate Pudding Pie


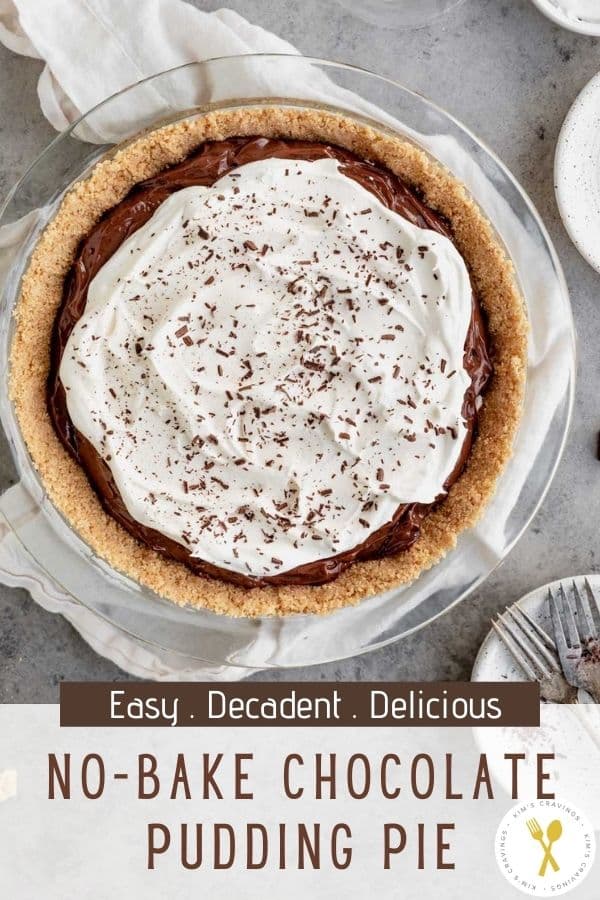
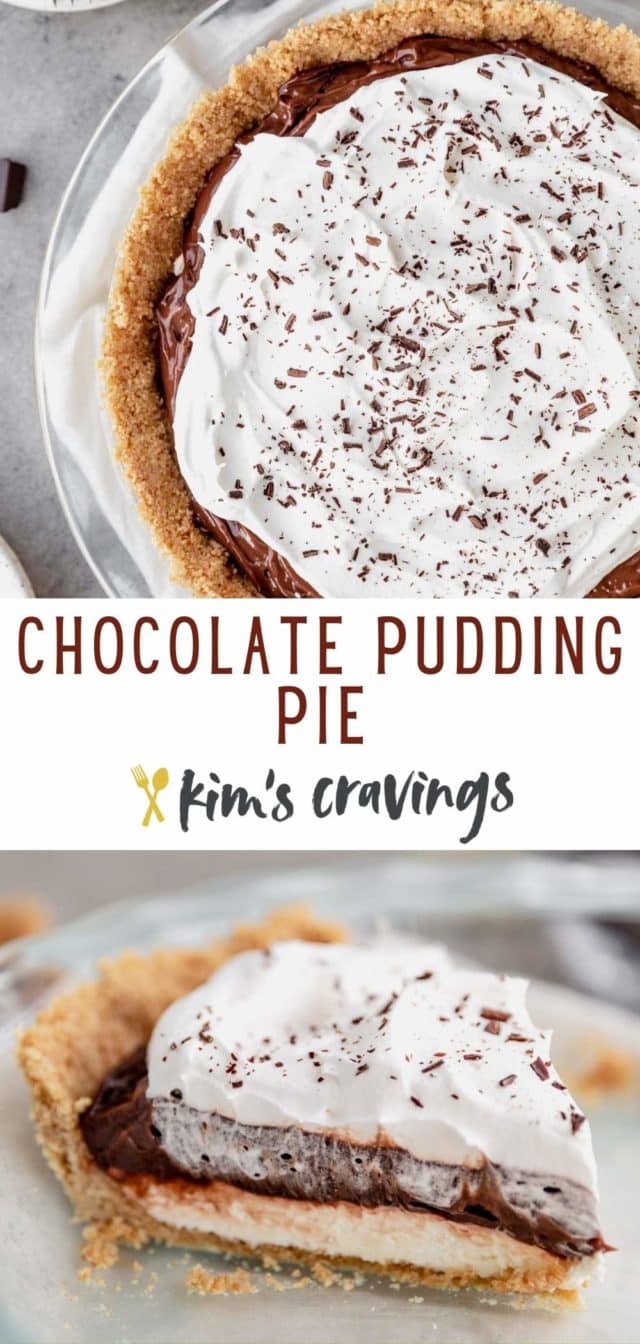
No-Bake Chocolate Pudding Pie is a family-favorite dessert! This easy recipe features a graham cracker crust that’s topped with layers of cheesecake filling, chocolate pudding, and Cool Whip. It’s absolutely irresistible and looks fancy, but is so simple to make with just 5 ingredients, plus the crust! Perfect for the holidays, Valentine’s Day, your next potluck or a summer barbecue.
EMAIL ME THE RECIPE!
This Chocolate Pudding Pie is so good that I really just want to high five my grandma right now! It’s one of my all-time favorite desserts, so easy and wonderfully delicious. I can’t even remember the first time I tried one of her chocolate pies, and then she passed the recipe down to my mom, who made a similar pie for many different occasions, from birthdays to new job celebrations.
So good! And you can do this with sugar free pudding and cool whip! Or different flavors! Love it!
— Maggie
Why you’ll love this recipe
- So simple to make. My grandma’s recipe simply involves mixing up the chocolate pudding, pouring it into a graham cracker crust and topping it with whipped cream (we always use Cool Whip). I elevated her chocolate pudding pie recipe to include an extra layer – a decadent, delicious cheesecake layer. Yes, please!
- Great for the holidays. If you’ve never made or tried this recipe, please do so VERY soon. Add it to your Thanksgiving dessert menu! It would be a great alternative to pumpkin pie. Or make it to enjoy after Christmas dinner. Since it’s a no-bake recipe, it doesn’t compete for precious oven space, plus you can make it a day or so ahead of time and let it chill in the fridge. It’s also just a great any time treat!
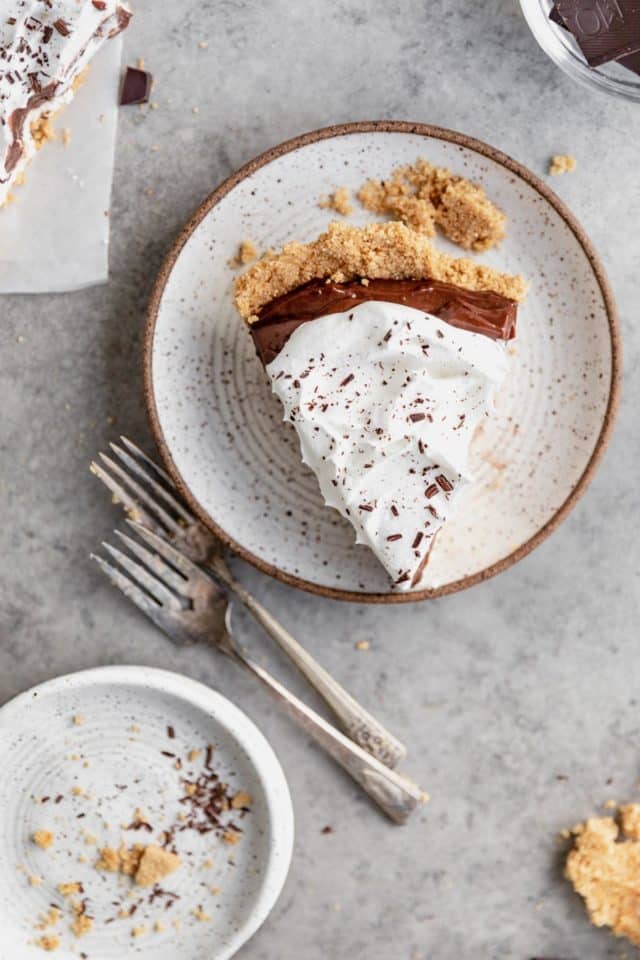
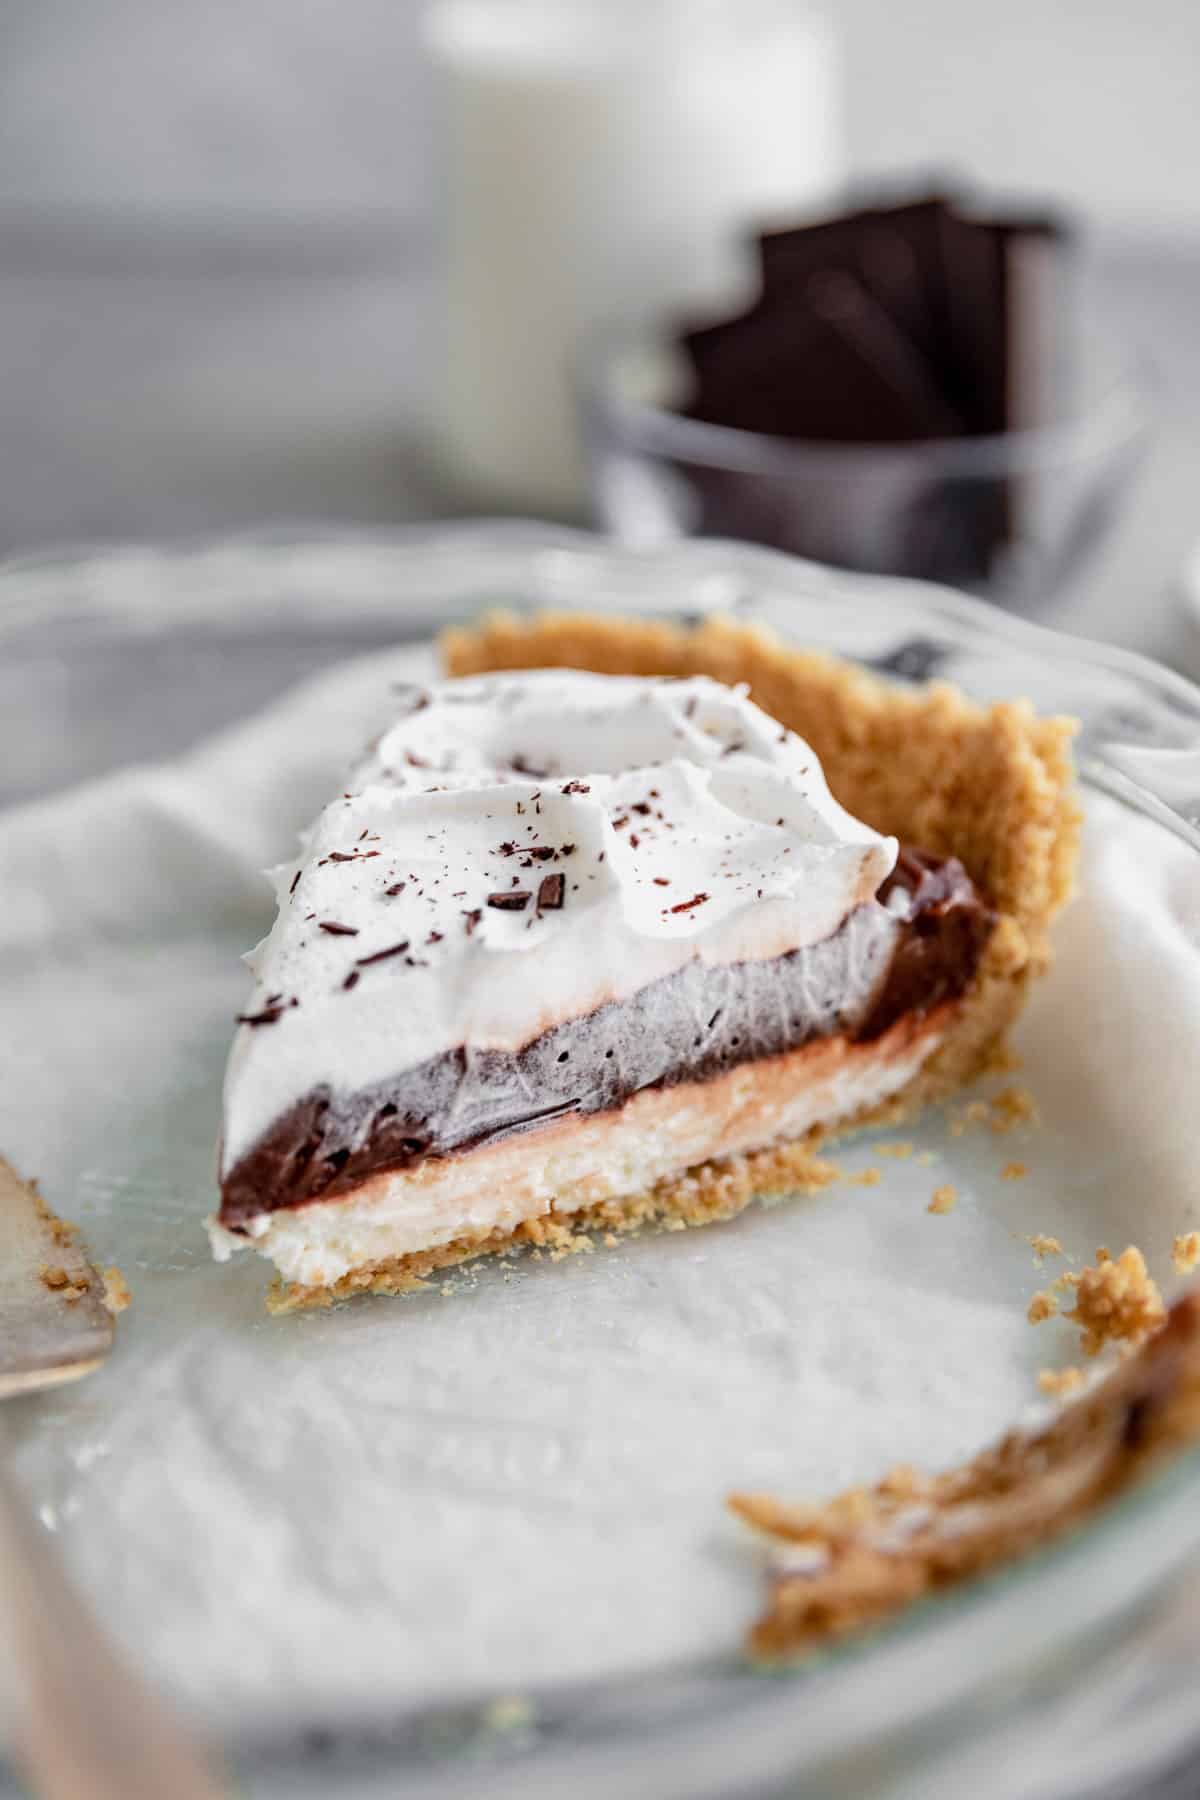
- Amazingly delicious. With a combination of cheesecake filling and creamy pudding piled into a sweet, buttery graham cracker crust, this layered chocolate pie is perfect for true chocolate addicts and the cure for many things including holiday blues, PMS, homesickness, lovesickness, and is a total hit with almost everyone that tries it!
Ingredients needed
The ingredient list is short and sweet! You only need 5 ingredients, plus the crust. Here’s the lineup:
- Graham cracker crust. You can buy a pre-made graham cracker crust from the store to save time, but I prefer a homemade graham cracker crust. It’s quick + easy to make with graham cracker crumbs, melted butter and sugar.
- Cream cheese. Make sure you use a block of real cream cheese, not cream cheese spread. I recommend using Philadelphia original cream cheese, as it will yield the best results. Cream cheese is typically pretty soft straight from the refrigerator and that will work great.
- Powdered sugar. We’re mixing powdered confectioners’ sugar with the cream cheese to achieve a perfectly sweet and tangy cheesecake layer.
- Cool Whip. One cup of the whipped topping is combined with the cream cheese mixture and the rest is used to top the pie. I haven’t tried subbing the Cool Whip for whipped cream, but I don’t think store-bought whipped cream would be sturdy enough. Homemade whipped cream should work, though. Whip one pint of heavy whipping cream using an electric mixer until stiff peaks form. Gently stir in 1/4 cup powdered sugar and 1 teaspoon pure vanilla extract.
- Cold milk. You’ll need to beat cold milk with the dry pudding mix, which will result in creamy chocolate pudding. I typically use whole milk when making desserts, but any milk variety should work fine.
- Instant pudding mix. Be sure to use one 4 1/2 serving size (or 3.9 ounces) box, not the large 5.1 or 5.9 box. Also, make sure that you buy the INSTANT pudding and not the regular chocolate pudding mix. Jello brand is my go-to.

Graham cracker crust
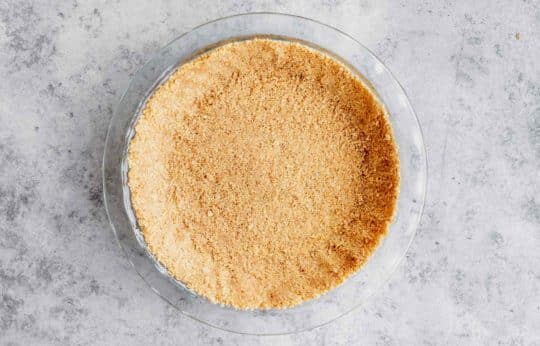
There are a variety of different crusts you can use for your chocolate cream pie recipe, but I personally love this pie with a simple graham cracker crust. Making homemade graham cracker pie crust is super easy and I much prefer the do-it-yourself method to the store-bought variety. It only takes a matter of minutes to make and has the perfect buttery crumble. There are only three ingredients needed for this crust – graham cracker crumbs (or graham crackers), melted butter and granulated sugar.
To make the crust:
- Make the crumbs. If you can’t find graham cracker crumbs (typically down the baking aisle), you can make your own by pulsing 10 full sheets of graham crackers in your blender or food processor until you have fine crumbs. If you don’t have a food processor, you could put the graham crackers into a bag and smash them with a rolling pin or something similar. You’ll just need to make sure to get fine crumbs because they will hold together better.
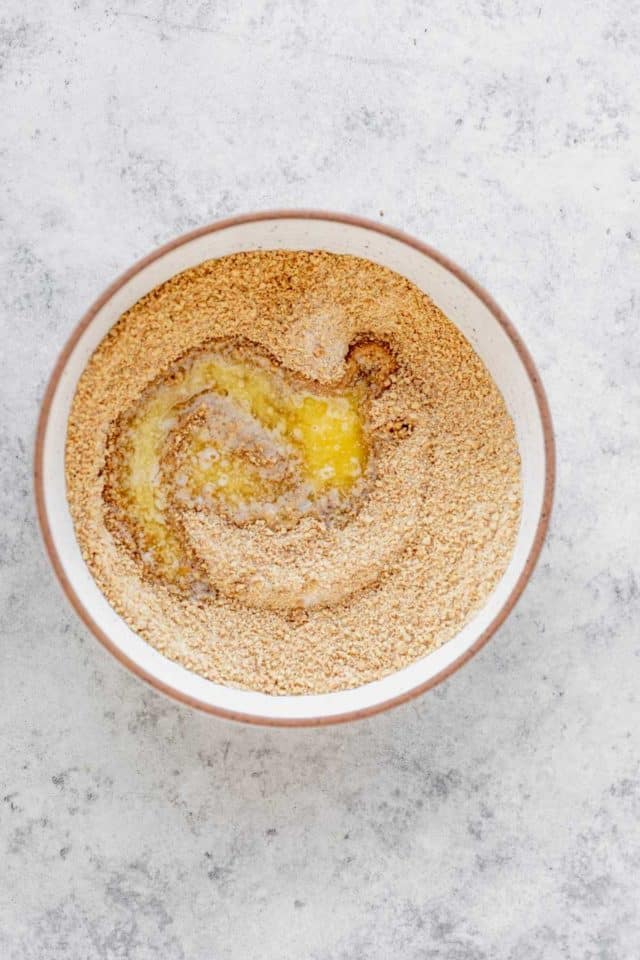
- Mix ingredients. Start by simply combining the graham cracker crumbs, melted butter and sugar in a medium bowl. Stir the mixture together until well combined.
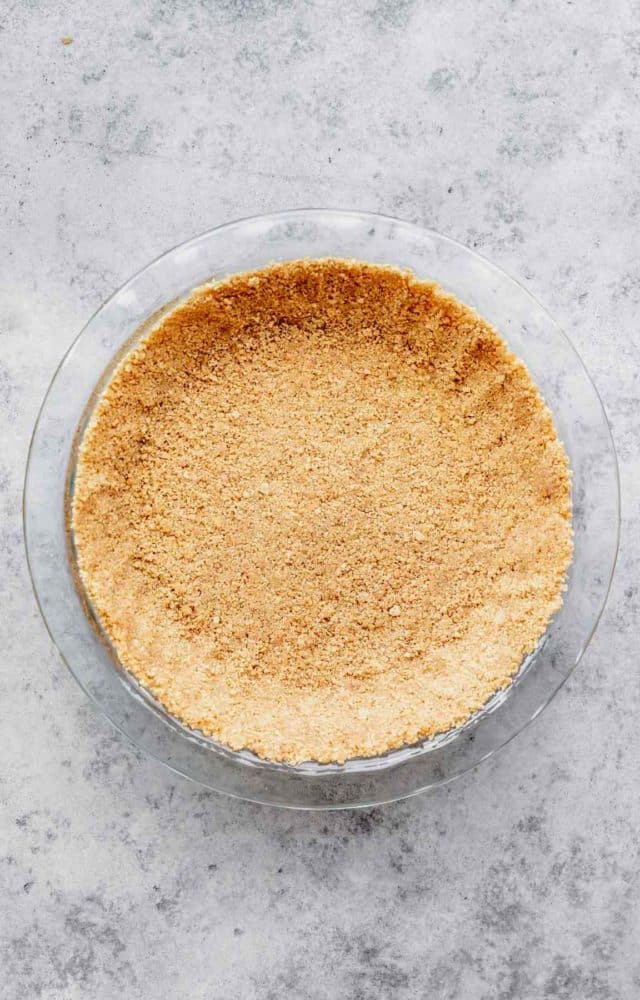
- Press this mixture into your pie pan. Make sure to firmly press it into an even layer on the bottom and around the sides. I like to use the bottom of a glass cup or measuring cup to help press the crust into the bottom of the pie dish to make sure it is tightly packed.
- Refrigerate. There’s no need to bake the graham cracker crust for this particular recipe. Stick it in the fridge or freezer while you make the filling. I like to let it hang out in the refrigerator for at least an hour before adding the filling.
How to make this recipe
Not only is the ingredient list short and sweet, but making this layered chocolate pudding pie is a breeze! Here’s a quick rundown of how to make this decadent dessert, but you’ll find the full, printable instructions at the bottom of the page.
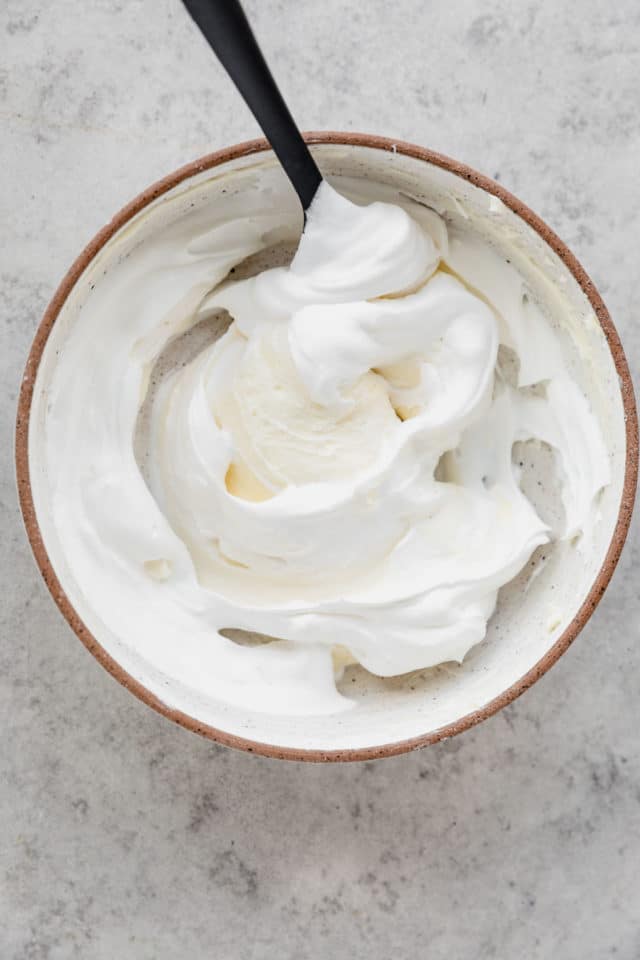
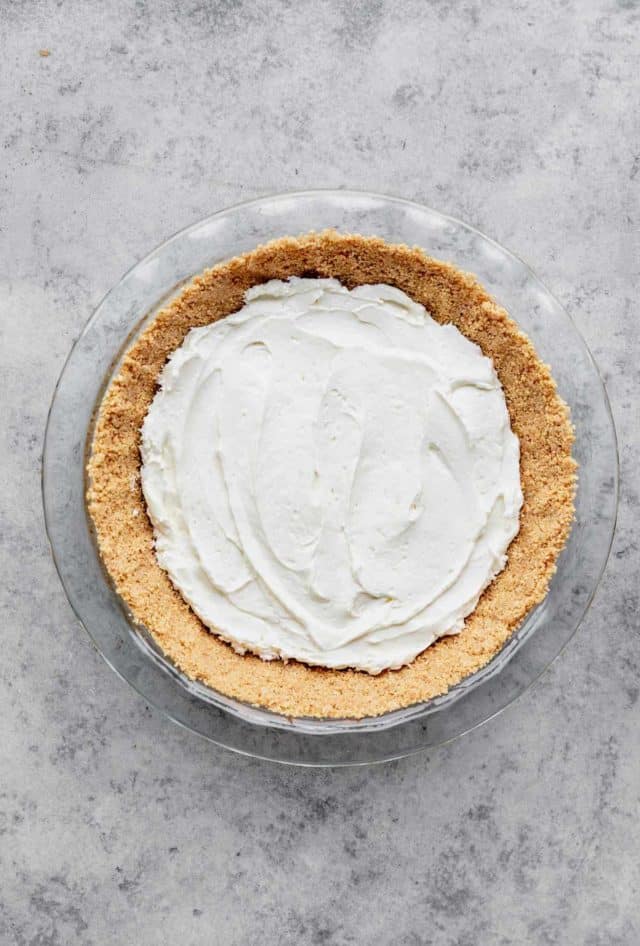
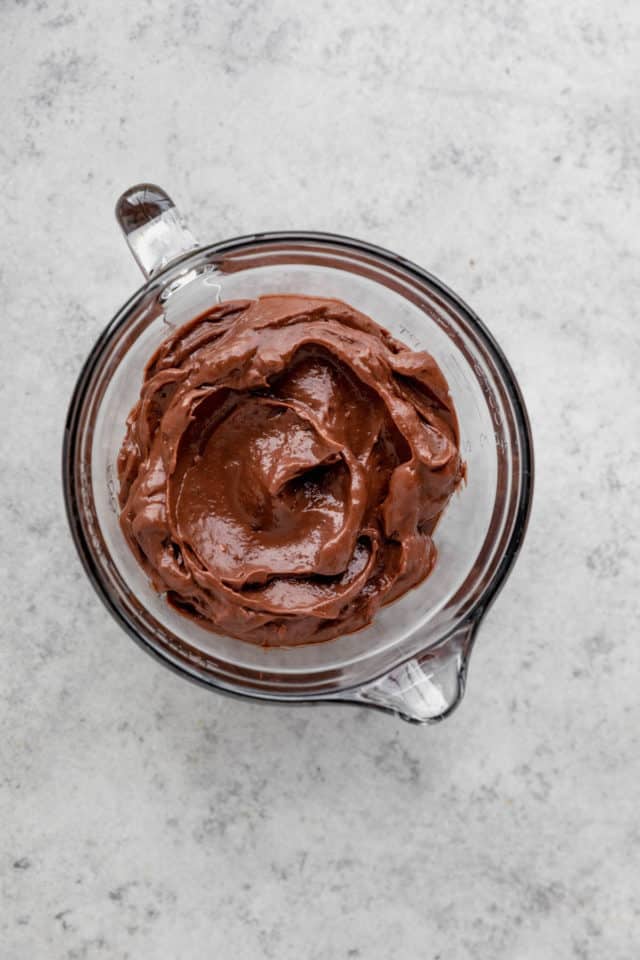
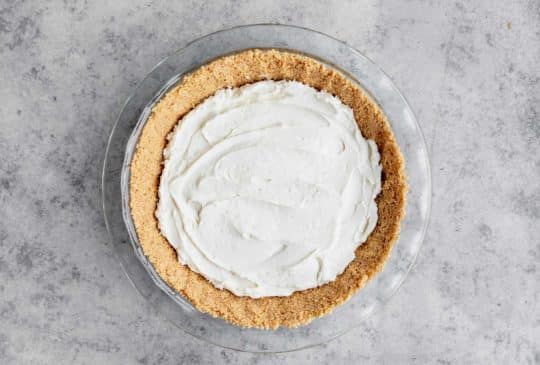
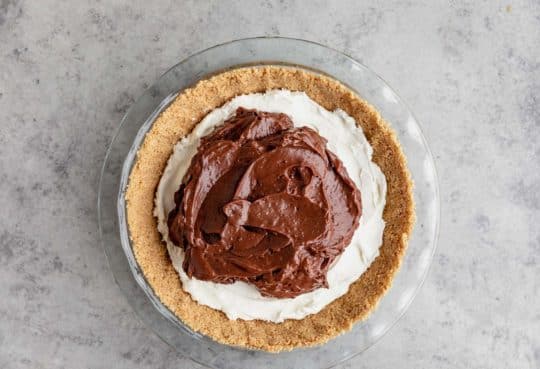
- Cheesecake layer. Once you’ve made the crust and while it’s in the refrigerator, make the cream cheese filling. Using a stand or hand-held electric mixer, beat the cream cheese and powdered sugar on medium speed until well blended. Gently stir in 1 cup of the Cool Whip. Spoon the mixture into the crust and spread, so that it’s evenly distributed.
- Chocolate pudding filling. Pour the milk into a medium or large bowl. Add the dry pudding mix and beat with a wire whisk or fork for two minutes and until well blended. Spread over cream cheese layer.

- Refrigerate. Place the pie into the fridge to chill for 3 to 4 hours or overnight and until set.
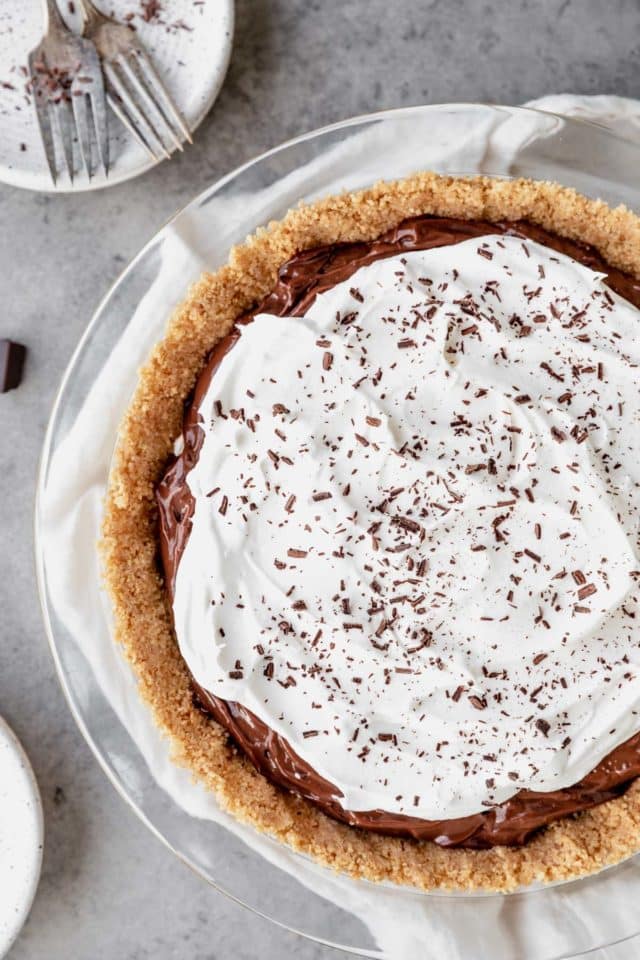
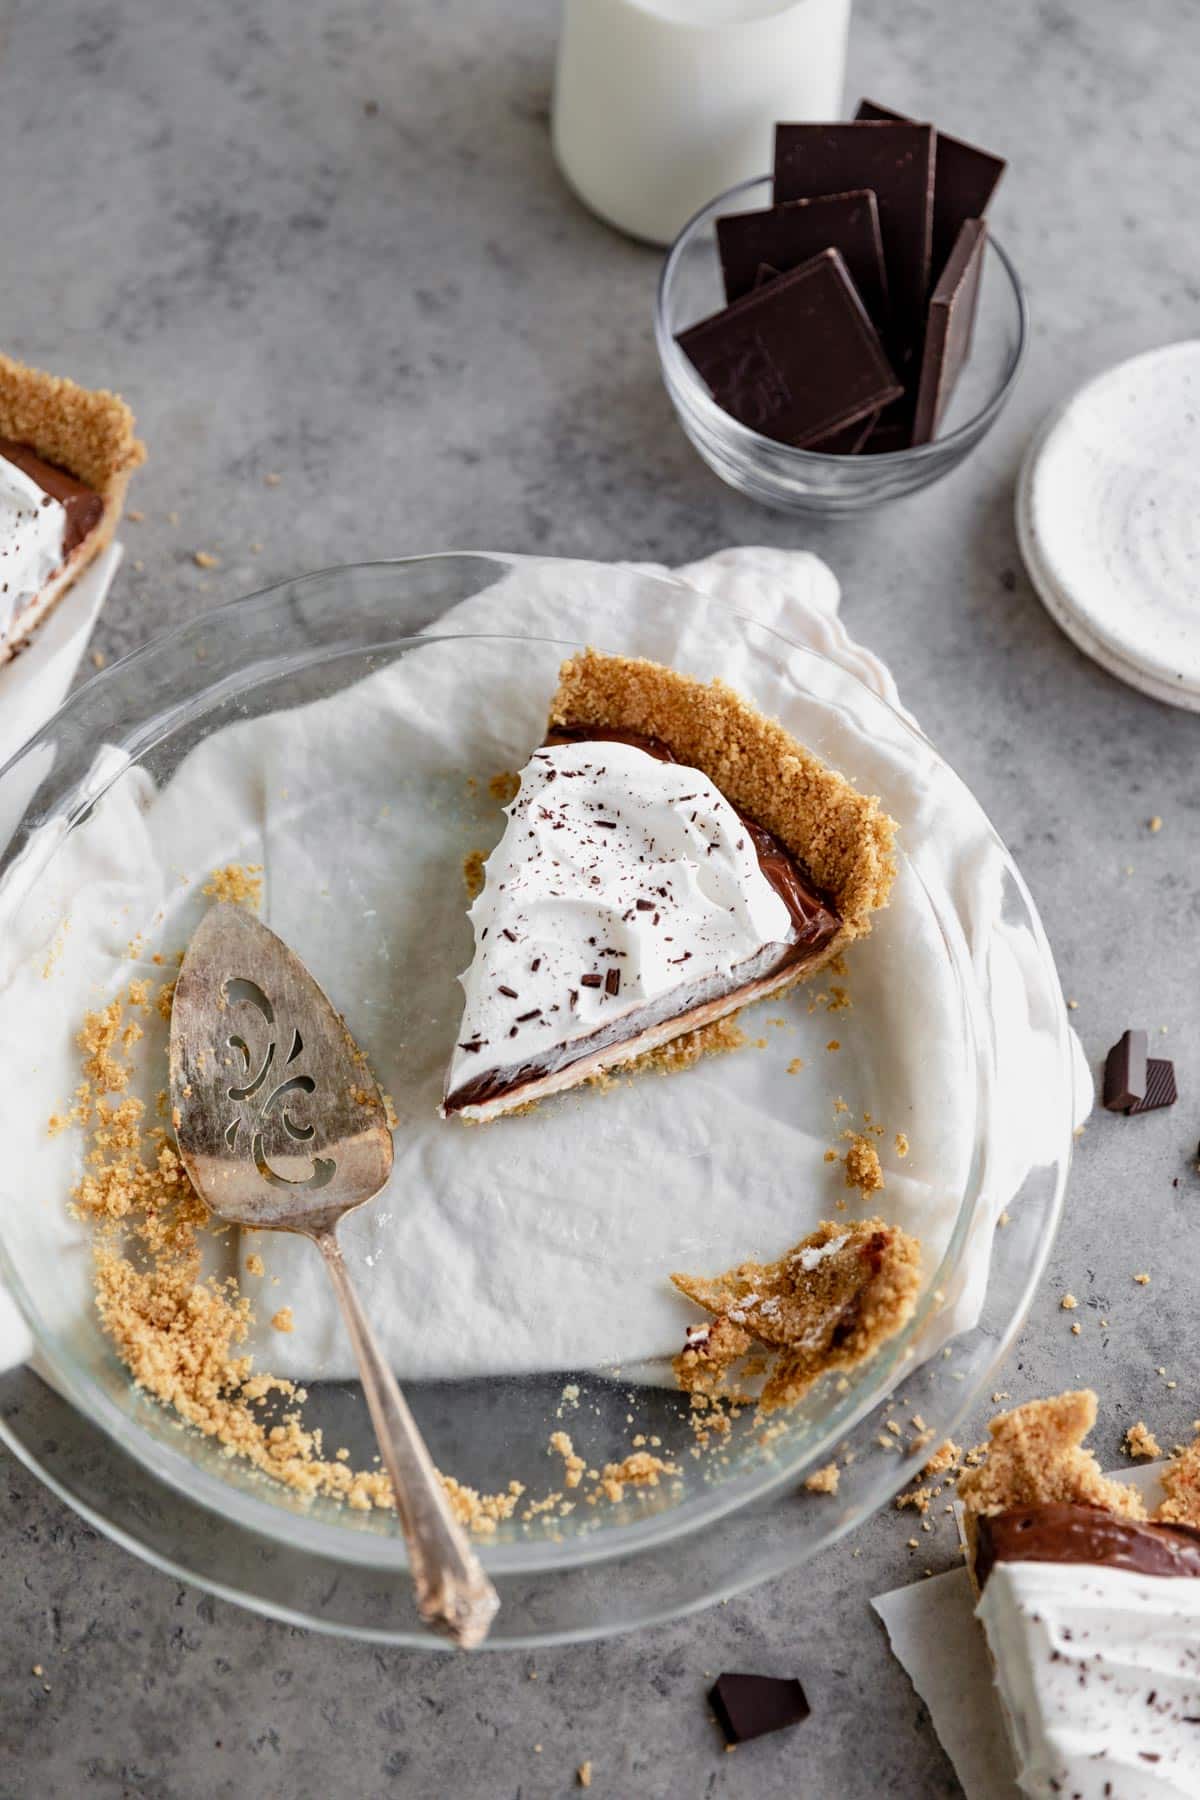
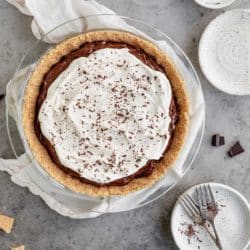
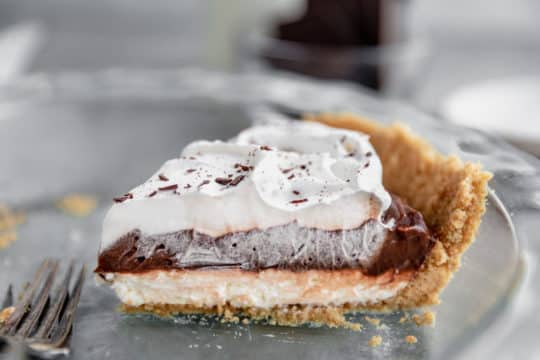
- Serve. Just before serving, top the pie with the remaining 1/2 cup of Cool Whip and smooth it out over the top of your pie. Alternatively, you can add a dollop of the whipped cream to each individual slice. If you’d like, garnish with a sprinkling of grated chocolate shavings. Slice and enjoy!
Tips for recipe success
Here are a few tips, so that your pie is absolutely perfect!
- Refrigeration time. For best results, be sure to refrigerate the pie for at least 3 to 4 hours, but 6 to 8 hours or overnight is even better. The longer you refrigerate this no-bake chocolate pie, the sturdier it will be and the more lovely the slices. Do not freeze it to set it. It will be difficult to slice the filling and the texture won’t be as smooth and creamy.
- Slicing. Use a clean, sharp knife to cut into slices for serving. For extra neat slices, wipe your knife clean with a paper towel between each cut.
- Make-ahead. This is the perfect dessert to prep ahead of time! You can even make it 2 days before you plan to serve it. If you are making it in advance, you’ll want to add the whipped topping and garnish just before serving.
- Storage. Before covering this to refrigerate, I like to just barely push a few toothpicks into the top of the pie, so that the plastic wrap doesn’t stick to the topping.
Frequently asked questions
This is an old-fashioned recipe that has been around for hundreds of years! Actually, make that thousands of years! According to foodtimeline.org – the earliest print reference found for chocolate pudding is 1730. They go on to say that this type of pie was most often enjoyed by wealthy people. Fancy! Today, there’s many different ways to make it, including from scratch, but I think the best way to make it is with a box of instant chocolate pudding mix because it’s SO easy.
This particular recipe cannot be made dairy free. Jello Instant Pudding will not set properly using non-dairy milk such as almond milk or coconut milk. In order to make a dairy-free chocolate pudding pie, you would need to follow a recipe that makes the chocolate filling from scratch. This vegan chocolate pudding pie has great reviews!
If you’d prefer to top the pie with fresh whipped cream you can, just don’t do it until right before you are serving. Whipped cream isn’t as stable as whipped topping, so it will melt if done ahead of time.

Customize this dessert
I’m pretty much obsessed with this recipe as-is, but there are lots of tasty ways to get creative with your dessert. Here’s a few ideas:
- Gluten free chocolate pie. If you want to make this chocolate pie with pudding gluten free, simply use gluten-free graham crackers for the crust. All of the other ingredients in the recipe are naturally gluten free!
- Pudding. Mix things up and try using different pudding flavors. Try a White Chocolate Pudding Pie using the white chocolate pudding mix, or you could make an Oreo Pudding Pie with the Oreo pudding mix and an Oreo cookie crust. A Banana Pudding Pie using sliced bananas as garnish would be delicious, too! The options are endless when you change up the pudding flavor and the crust flavor!
- Crust. An Oreo crust made with Oreo cookies would be amazing and then you could garnish the pie with Oreo cookie crumbs and cookies. Sounds delish! You can find the recipe to my Oreo crust here.
- Garnish. For the chocolate shavings, I simply used a grater to shred a bit of a chocolate bar. It’s really an optional step, but makes this dessert look so pretty. Plus, there’s no such thing as too much chocolate! You could also garnish with a few tablespoons graham cracker crumbs, chopped milk chocolate, toffee bits, crumbled Reese’s peanut butter cups, M&Ms, chocolate chips, sprinkles, or any other favorite candy that you like. You could even experiment with using crumbled cookies!
Make-ahead options
Because of the necessary refrigeration time, homemade chocolate cream pie is a great make-ahead dessert! You can make this up to 2 days in advance. Cover and refrigerate before adding the whipped topping and garnish. You can also make just the crust up to 2 days ahead of time. Cover and refrigerate up to 2 days before adding the filling.
Storing leftovers
Leftover chocolate pie will keep well, covered, in the refrigerator for up to about 5 days. I seriously doubt it will last that long, though!
You will not be disappointed by this easy, delicious chocolate pudding pie – it’s so simple and a total crowd pleaser! I also love that it can be made days ahead of time, so on the day of your event all you need to do is slice, serve and enjoy!
More favorite pie recipes
Looking for other easy, super delicious pie recipes? If so give some of our other favs a try!
If you try this recipe, let me know! Leave a comment and if your family loves it as much as mine does, be sure to give it a five star ⭐️ rating! Also, tag @kimscravings on Instagram with a picture of your creation. Be sure to subscribe to our mailing list to receive more healthy delicious recipes straight to your inbox.
Chocolate Pudding Pie
Ingredients
For the crust:
- 1 1/4 cups graham cracker crumbs, (10 full graham cracker sheets)
- 1/3 cup butter, melted
- 1/4 cup sugar, (I use slightly less than 1/4 cup)
For the pie:
- 1 (8 ounce) package Philadelphia cream cheese, softened
- 3/4 cup powdered sugar
- 1 1/2 cups thawed Cool Whip, divided
- 1 3/4 cups cold milk
- 1 (4 1/2-serving size) package (3.9 ounces) Jello Chocolate Flavor Instant Pudding & Pie Filling
- Optional: grated chocolate sprinkled over the top
Instructions
- Combine all crust ingredients and firmly press with fingers into a 9-inch pie plate. Refrigerate for 1 hour before adding the filling.
- Using a stand or hand-held mixer, beat cream cheese and powdered sugar on medium speed until well blended. Gently stir in 1 cup of the Cool Whip. Add mixture into crust and spread so that it is evenly distributed.
- Pour milk into medium bowl. Add dry pudding mix and beat with a wire whisk or fork for 2 minutes or until well blended. Spoon over cream cheese layer.
- Refrigerate 3 to 4 hours or overnight and until set. Just before serving, top with remaining 1/2 cup whipped topping and sprinkle with grated chocolate, if desired. Slice and enjoy!
Notes
- Crust. You can use a store-bought graham cracker crust instead of making your own. I personally like homemade best!
- Covering the pie. Before covering the pie to refrigerate, I like to just barely push a few toothpicks into the top of the pie, so that the plastic wrap doesn’t stick to the topping.
- Storing leftovers. Pie will keep well, covered in the refrigerator, for up to about 5 days.
- Make ahead. This pie can be made up to 2 days in advance. If making in advance, cover and refrigerate before adding the extra Cool Whip topping and chocolate shavings. You can also make just the crust 2 days ahead of time. Cover and refrigerate it for up to 2 days before adding the filling.
Did you make this recipe?
Tag @kimscravings on Instagram and be sure to subscribe to our mailing list to receive more healthy and delicious recipes straight to your inbox!
Super happy I found your recipe! Delicious ?. This will be my go to for pudding pies. Thank you.
So happy you enjoyed!!
This is the third time I made this pie. I absolutely love it and so does my family. Make it, you won’t be disappointed.
Yay! This makes me so happy to hear!
This recipe was so good! Easy to make and it tasted delicious!
So good! And you can do this with sugar free pudding and cool whip! Or different flavors! Love it!